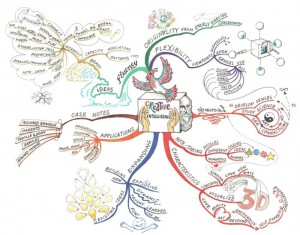
Most of my projects start out as mind maps (which I may have mentioned before). Whether it’s a packing list, a blog post or a TextMate bundle, I find it easiest to organize my (often scattered) thoughts using what Tony Buzan calls radiant thinking. Lists and outlines are rarely as effective as the non-linear format of a mind map. For me, if it involves brainstorming, it involves mind maps.
This post isn’t about how to mind map (but this one is). It’s a summary of the process by which I settled on my current set of tools. I used Mindjet MindManager (Mac) together with the web app MindMeister for years. As with all things in the Mac app world, I played with every mind mapping application that came out, but only recently have I found myself actually looking for a new workflow. It has, primarily, to do with three things: frustration with MindManager, the advent of the iPad, and a wealth of new alternatives. I’m currently down to a collection of solutions across three platforms (Mac, iOS and web) which meet all of my requirements and offer interoperability with each other and other tools in my workflow.
What went wrong with MindManager
In my opinion, MindManager is still the most powerful mix of ease-of-use, OS integration and aesthetic options on the market. In recent years, though, it’s been apparent that the Mac platform has become an afterthought for the developers. The Windows versions are taking leaps and bounds, and the Mac version has little parity with its feature set. The new features in the last $99 upgrade were pretty much useless to me; in my workflow they were just feature bloat. The decision to find something else was based mostly on disappointment with the development and what I consider to be unduly expensive prices, even for existing customers.
The options
Here’s my checklist of features that I knew I needed in any app I was going to consider:
- Intuitive keyboard navigation
- The ability to visually connect non-contiguous nodes
- Support for images
- Sufficient export options
- at the least, OPML, PDF and a format interoperable with other mapping applications (Freemind is pretty standard)
- The ability to import other mind map formats, and preferably OPML
- Smart/auto layout (moves existing nodes out of the way of new nodes without interaction)
On the Mac
There’s a fairly wide field of options to consider. I’m quite certain I’ve tried everything available on both Mac and iOS at this point. For Mac, these include NovaMind, iMindMap, Freemind, MindNode, XMind and Curio, among others. I already use Curio for project management, and it’s an excellent choice for any information gathering and organization, but I find it to be overkill when I just want to mind map. I also ruled out NovaMind because I found it a bit unwieldy, though I think that the developer is onto some great things. I ruled out Freemind because it’s old and ugly, and I’m prejudiced like that. XMind and iMindMap are nice and easy to use, but their Java roots and lack of OS integration were turnoffs for me. The one that met my needs and my standards almost perfectly was MindNode Pro.
In a nutshell, MindNode is a minimalist mind mapping application that does exactly what it needs to. It’s easily usable with just the keyboard (customizable shortcuts, even), handles auto-coloring and map layout smoothly and integrates with standard OS X media options and features. You can quickly customize a limited set of options (branch color, font, node width) using standard palettes and tools, and you can add images, audio and file links quickly via drag and drop or from a media palette (with Quick Look support). In short, it meets my needs and has zero feature bloat.
On the web
There’s really only one option for web-based mind mapping that I’ve found worthy: MindMeister. It’s nearly as nice to use as a desktop app, has some very cool extra features without being too heavy, and its import and export options fit perfectly in my workflow. It can also share embedded, interactive maps.
The Geistesblitz feature uses the (extensive) API to make it possible to add quick thoughts to a map from just about anywhere: Dashboard, a web browser, iPhone, iPad, etc. The API has also allowed me to integrate similar functionality into LaunchBar, QuickSilver and TextMate, to name a few. Best of all, it supports live collaboration with realtime updates, chat and permission control. If I’m collaborating with others I run it in Fluid instead of using a desktop application.
On the iPad
There are some amazing options for mobile mind mapping. I won’t list them all, just the ones I actually use:
There are other, more general options for brainstorming which have also made it onto my homescreen, such as Popplet, OmniGraffle, Idea Boards and HeadSpace, but I’ll keep this focused on traditional mind mapping apps.
MindNode for iPad is an obvious choice for me, with great interaction with the desktop version and available sharing options. It’s as easy to use and as minimalist as MindNode Pro is on the Mac. I couldn’t stop using iThoughts HD, though… it has an awesome feature set and its export options mix well with my other choices. The native MindMeister app also mixes well, integrating with the web version and exporting formats I can import to other apps. I use MindNode when I know I’m going straight to my desktop when I’m done, iThoughts HD for standalone, mobile mapping with portability options and MindMeister for any collaborative efforts, as well as quick, single thoughts.
Since we’re talking about mobile brainstorming, I would be remiss not to acknowledge the utility of the original mind mapping app: paper. A Moleskine and a basic understanding of mind mapping principles provide all the tools you need to brainstorm anything, anywhere. The major benefit that the iPad has is instant, on-the-fly reorganization and modification of nodes, as well as portability to other mediums. OPML will get you from a mind map to a Scrivener document, an OmniOutliner project or even good old Markdown.
A flexible workflow
With this collection of tools I can use the right app for the job in any given situation. By considering export options, I can always be sure that whatever I create will translate to other platforms and structures. As an added benefit, all of these options combined still cost less than half as much as buying the desktop version of MindManager.
Each of these apps has their own neat tricks and features. For example, in the web version of MindMeister you can select a node and hit the image button (don’t trigger the dropdown) and you’ll get a random (but usually sensible) image for the node. It works with the link button, too, adding a Wikipedia or other link based on the node’s text. In MindNode, select all and copy, then paste into a text-based application. You’ll get an indented list of your nodes, in order from top right moving clockwise around your map. This is a great way to get your thoughts from map to outline when writing, without dealing with OPML export and multiple applications. I use a homebrew System Service to convert it to a Markdown outline in any text editor.
If you haven’t tried mind mapping, grab any of these apps (or a good book) and see if it’s a fit for the way you think. I personally believe that the method is superior for any type of thinker, but I only have one thought type to compare. If you dig it, hopefully these results of my extensive “fiddling” will help you begin building a toolset that’s right for you.
